“Shake & Bake” Fried Elk Steak

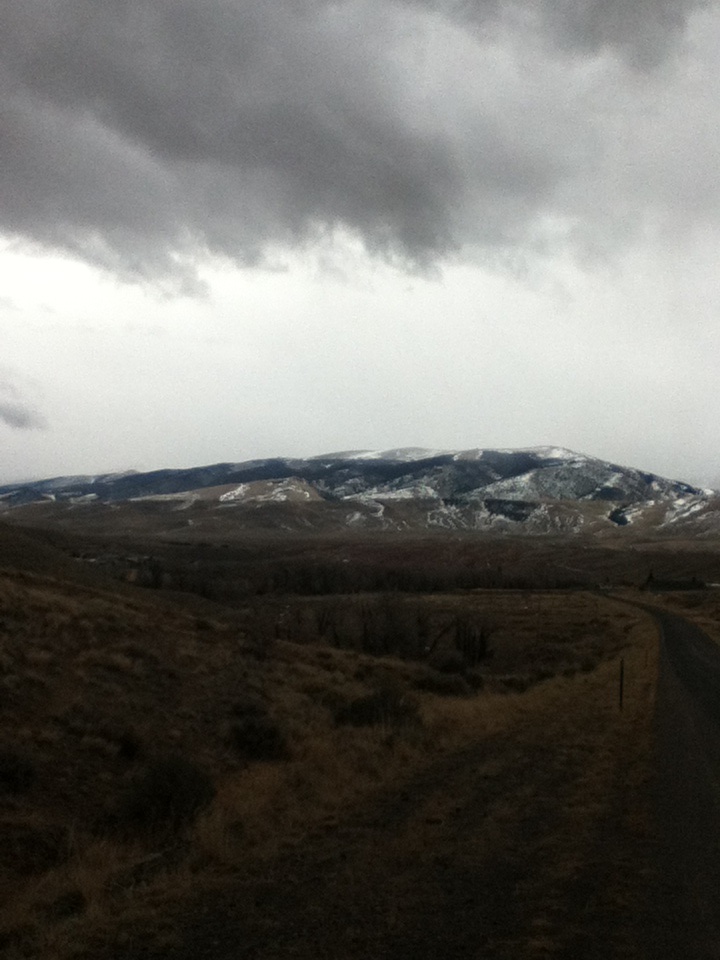
Get ready, cuz we’re busting out the Fry Daddy for this one! I got home just at dark from a fun 5-mile ski on the National Forest yesterday afternoon and was ready for dinner. I am pleased to say that it is not totally dark now until 6 pm– so exciting! It’s nice to know there is a little daylight left on days I work until 5:30. Jade “helped” me cook dinner from her perch on the yoga mat. She loves laying on it!

???????????????????????????????See the little blue ball? It does not belong to Jade. Even as a puppy she was too “mature” to play with toys or fetch. I roll around on that ball and use it as a foam roller of sorts to work out the soreness in my hips and IT band after running or skiing (problems I never had until I herniated a disc in my back in 2010). Please let me know if you have a good recommendation for a foam roller. I am thinking about getting one, but am afraid it will have to be very firm, like the ball, to acutally do anything for me!


Shake and Bake Fried Elk Steak

Serves 3

In order to ensure even cooking in the fryer, you will need to use butterflied steaks for this recipe. If your steaks have not been butterflied while processing the meat, you can do it now. To butterfly, make a cut in the center of the steak that splits the steak into two halves so that it looks like a butterfly with open wings, WITHOUT cutting all the way through the steak.

Once your steaks are butterflied, the marinade is next. Marinade steaks in the following dry rub in a ziplock bag for 3-5 days:

Combine a big shake of the following in a small bowl and pour onto steaks.

  • cumin
  • chili powder
  • onion powder
  • season salt
  • garlic salt
  • black pepper
  • cajun seasoning
  • Mrs Dash
  • Worcestshire

You will also need:

  • Vegetable oil
  • 1.5 cups AP Flour
  • 1 tsp Season salt
  • 1/2 tsp black pepper

I marinaded these steaks for 5 days. It may seem like a long time, but after my last experience a month ago cooking elk steak that was literally inedible due to the gamey taste that resulted from not marinading it before hand, I was taking no chances this time around. It has taken this long just to get that taste out of my mouth and to want to eat elk steak again!

So, when you are ready to eat, if you own a deep fryer get it revved up and sizzling. Most deep fryers have a line inside showing the minimum level that the oil must reach. If you don’t have a deep fryer, it’s perfectly fine, just pour vegetable oil in a medium frying pan about 3/4-inch deep. Begin to heat oil by either turning on the fryer or stovetop.  Once oil is bubbling, you can drop in the steaks carefully to avoid splatter. This “Fry Daddy” is known to take an eye out with hot oil if not careful! One advantage of it though is that while cooking, all of the oil splatter is contained inside the fryer.

But first, using the same ziplock bag your marinaded the steaks in, drain out excess blood and pour in about 1.5 cups AP flour along with 1 tsp. of season salt and 1/2 tsp black pepper. Now shake until meat is coated completely. And Fry!

???????????????????????????????

Fry steaks for about 2 minutes and flip. Fry for another 3 minutes and check. I usually pull out one steak onto a bowl with a paper towel in it and make a cut into the center to see if there is still raw meat. At this point I had to deepen the butterfly cut in two of my steaks so that they could open up more and cook.

???????????????????????????????

If your steaks need more time, check every two minutes until they are golden brown and not spongy when when push on the center of the steak with tongs or a knife.

???????????????????????????????

Allow steaks to drain some grease on a paper towel laid on a plate for a minute or two and enjoy.

???????????????????????????????

~~~~~~~~~~~~~~~~~~~~~~~~~~~~~~~~~~~~~~~~~~~~~~~~~~~~~~~~~

On a side note, how often does eating game or produce you or a family member has harvested or grown take you back to the hunt and the experiences that went with getting the meat or vegetables from the mountain to your plate? I am curious…sometimes I think about it in detail about the origin of the meat I am eating and sometimes I can’t remember with certainty the species of the ground meat on my plate {  Label those bags! ; )  }.

Skillet Tortellini with Wild Game Pasta Sauce

Since I am really only cooking for one most of the time during the winter due to Joe’s work hours, I often find myself with leftovers to eat. This recipe is perfect for a quick weeknight meal that takes only about 15 minutes to prepare and makes fantastic leftovers that you won’t mind having around the house. Please note that this recipe can be doubled easily for a family of four. I made this recipe with the thawed ground elk meat that had been sitting in the fridge for a while and needed to be used up. This is a basic sauce because tomato puree was all I had on hand, and it turned out good for this recipe. As an alternative, this spaghetti sauce recipe is a favorite of mine if I have a little time to spare and the ingredients it requires.

???????????????????????????????

Skillet Tortellini with Wild Game Pasta Sauce

Yield: (3) 1- cup servings

  • 2 cups frozen cheese tortellini (I used Great Value brand)
  • 1/2 lb. ground wild game
  • 1 1/2 c (12 oz.) tomato puree
  • 1/4 cup yellow onion, diced
  • 1/2 cup Italian Blend or mozzerella cheese
  • 1/2 cup Parmesan cheese, divided

Seasoning:

  • Italian seasoning
  • Basil
  • Garlic salt
  • Season salt
  • Black pepper
  • Onion Powder
  • Oregano

1. Spray a frying pan with cooking spray and brown ground meat with diced onion. Meanwhile, start water boiling in a medium pot for the tortellini.

2. Liberally season meat mixture by shaking in Italian seasoning (about 1 T.), and basil, garlic salt, season salt, black pepper, onion powder, and oregano in smaller batches (about 1/2 tsp.) until you achieve your desired taste.

3. As meat browns, crumble with a wooden spoon and add in tomato puree and half of the parmesan cheese (1/4 cup).

4. Simmer meat and sauce on LOW heat until meat is cooked through, about 5 minutes.   Taste and add more spices if desired.

5. Measure out 2 cups frozen cheese tortellini and boil for 3 minues until pasta in tender.

6. Drain pasta, rinse, and pour into frying pan with meat and sauce mixture.

7. Stir gently to combine. Top pasta with Italian blend shredded cheese (or mozzerella) and remaining 1/4 c parmesan cheese.

8. Serve immediately.

???????????????????????????????

The Calm Before the Storm

I hope your Sunday is everything you had planned it to be. This Sunday afternoon we have what I like to call The Calm Before the Storm: when there is eerily no wind at all for an extended period of time, but the skies to the north and west darken in anticipation of the coming storm.

image

I could not resist the opportunity to go for a run this afternoon due to The Calm Before the Storm and 41 * temps, even though I had intended to take today off since I have run the past three days. I knew I would regret it if I did not take advantage of these rare conditions, so I set out for a 3 mile out-and-back trip to watch the clouds darken to the north and the storm roll in. And now, and hour later, the storm has arrived and the snow is falling.

Yesterday I decided to flip back to an old recipe and make bread for the week. Molasses Wheat Sandwich Bread is from the cookbook A Taste of Dubois. It has been a while since I have made this bread, the last time being while I was still working as a pastry chef two years ago. When I make a sandwich or put an egg on toast, I like a hearty wheat bread, and this fits the bill. It has a distinct flavor from the molasses but is not overly sweet. This recipe makes a wholesome sandwich bread that would also be a good side for soups just plain with a smear of butter. The only suprise was that the slices do not get as large as store-bought sandwich bread, probably only half the size, which is fine by me because it is a filling bread anyway. Just be prepared for smaller sandwiches!

DSC01093

Molasses Wheat Sandwich Bread

Yield: 1 loaf (approximately 17 sandiwch slices)

Bowl #1

  • 3/4 cup boiling water
  • 1/2 T butter
  • 1 t salt
  • 1/4 c. sugar
  • 1/2 c. old fashioned oats

Bowl #2

  • 1/4 c. + 2 T. warm water
  • 1 pkg. yeast (1/4 oz.)
  • 2 T. Molasses
  • 2 T. brown sugar
  • 1 1/2 cup Whole Wheat Flour + 1 T. for kneading
  • 1 1/2 cup AP Flour + 1 T. for kneading

DSC01073

1. In a mixing bowl combine boiling water, butter, salt, and sugar. Stir in oats and allow to cool for one minute.

DSC01074

2. In another larger mixing bowl, dissolve yeast in warm water.

DSC01076

3.  Stir in molasses, brown sugar, and 1/2 cup flour. Beat with a wooden spoon until smooth. Add oat mixutre and the remaining 2 1/2 cups flour to make a stiff dough.

DSC01078

4. Transfer dough onto pastry mat or board to knead until smooth and elastic. I added another Tablespoon of both whole wheat and AP flour during this stage to get the dough to the desired consistency.

DSC01079

5. Shape dough into a ball.

DSC01081

6. Place in a greased bowl sprayed with cooking spray, turning once to coat both sides.

DSC01082

7. Cover with plastic wrap and let rise for about 1.5 hours (mine rose for 2 hours while I was out doing errands.)

DSC01084

8. Remove from bowl and shape into a log. Fold into thirds.

DSC01085

9. Now fold into half and place into a greased loaf pan.

DSC01086

10. Bake at 375* for 4o minutes until lightly browned. Check at 30 minutes to see if the bread needs to be covered with tin foil for the last 10 minues if it is getting too brown. Loosen and remove from pan and allow to cool. I don’t have a wire rack, so I simply invert my loaf pan and let the bread rest on it.

DSC01092

11. Once bread is completely cooled, slice into individual slices using a bread knife, if desired.

DSC01103

DSC01094

My loaf yielded 17 sandwich slices, which I packaged into ziplock bags to make my own loaf for the week (6 slices per quart-bag, then all bags into a gallon-bag).

DSC01106

Nutrition Data– From Spark Recipe Calculator, per 1/17 slice:

Calories- 106

Fat- 0.75 g

Total Carbohydrate- 23 g

Dietary Fiber- 0.75 g

Protein- 2.3 g


Elk Enchiladas with Homemade Enchilada Sauce

I made these enchiladas with a use-up-what-we-have mentality and they turned out pretty good. I think they tasted better the second day, actually. They would be good using chicken and cream of chicken in the sauce recipe, too.

DSC01065

Elk Enchiladas with Homemade Enchilada Sauce

  • 2/3 lb ground elk/venison/meat
  • 5 medium flour tortillas ( I use Mission Carb Balance)
  • 1 c. shredded cheese ( cheddar / cheddar jack)
  • season salt
  • Green onions, optional

Homemade Enchilada Sauce:

  • 3/4 can cream of mushroom soup
  • 2 c. tomato puree
  • 3/4 c Mild Rotel
  • cumin
  • chili powder
  • garlic salt
  • black pepper
  • cilantro

Preheat oven to 350.

1. First prepare the sauce. On medium heat combine mushroom soup with tomato puree, 1/2 c Rotel, and spices in a frying pan. I did not measure the spices, so add a little at a time until you get the level of desired heat.

2. Transfer enchilada sauce to a small bowl. Spray the pan with cooking spray and cook meat until no longer pink. Season with season salt.

3. Add half the sauce into meat and stir to combine.

4. Begin assembly: Scoop meat into each tortilla and top with a big pinch of shredded cheese. Roll and place into a greased 8×8 baking dish. Repeat five times or until all enchiladas are assembled.

5. Pour remaining enchilada sauce over top and sprinkle the remaining cheese.

DSC01066

5. Cover with tin foil and bake for 20 minutes. Garnish with green onions, if desired.

Gardening Tip-  These green onions are from the garden. After harvesting them, I washed and finely chopped the onions put them into a clean, empty pop bottle that I keep in the freezer. That way I can shake out however many onions I need throughout the year.

Venison Bratwurst Slow Cooker Style

Grilling outdoors is one of the best parts about summer. We have had some teaser weather lately with temps in the high 40’s, but still a bit too cold and dark for cooking on the grill. But, the good news is the creek is open for the horses so I can stop chopping ice- yay! Although I don’t mind visiting these guys at all…

DSC01035

DSC01037

Whatcha got there…? Candy? Do I see horse candy?!

There are still about 8 packages of homemade venison brats in our freezer that were made last fall, and I am  slowly using them up. To make the venison brats, we used a kit from Hi Mountain Seasonings and added in frozen hash browns and diced yellow onions while grinding the meat prior to stuffing it into casings.

I saw on a pin on Pinterest a few weeks ago about cooking hot dogs in bulk in a slow cooker, and thought that the crockpot would be perfect for making brats during the winter months when using the outdoor grill is not an option and boiling them takes FORever. In the spirit of warm weather and to use up our remaining potatoes from the garden that are now growing eyes, I served these brats with MO’s Potato Salad.

Venison Bratwurst Slow Cooker Style

Serves 3

  • 3 homemade venison bratwurst
  • 1/4 cup water + 1/2 cup water
  • 1/3 c. chicken broth
  • 1/2 of a yellow onion, sliced into strips
  • Hotdog buns/ bread
  • 3/4 tsp. yellow mustard (optional)

1. Slice onion into thin strips.

2. Pour 1/4 cup water into a frying pan and sear brats in the pan on medium-high heat for approximately 5 minutes, turning once just so they start to brown on both sides and do not scorch.

3. Place brats in crockpot with 1/2 cup of  water and chicken broth and top with onions. Squirt in 3/4 tsp. yellow mustard, if desired. I really like the little kick that it added to the flavor of these brats, but the mustard is totally optional if it’s not your thing.

4. Cook on LOW for 6 hours of HIGH for 4 hours.

DSC01055

4. Serve topped with onions.  (And then buried in ketchup!)

DSC01058

MO’s Potato Salad

  • 4 medium yukon gold potatoes, or equivalent
  • 3 hardboiled eggs (my parents are nice enough to give me eggs from their chickens once a week!)
  • 3 T. yellow onion, diced
  • ~1/2 c. Hellman’s Light Mayo
  • 1 T. French’s yellow mustard
  • Pickle Juice, to taste (I probably pour in around 1/4 c)
  • salt & pepper

1. Wash, peel and boil potatoes.

Gardening Tip- Our potatoes were harvested in Septmeber in are just now developing significant eye growth. Store extra potatoes in a cool, dark place, such as a closet or paper bag, and they will last for months.

DSC01044

2. Drain water from potatoes and stick pot in the freezer for five minutes.

3. Add in remaining ingredients and combine. I like to make a creamier potato salad so I use a hand mixer to combine. If you like a chunkier potato texture, combine with a wooden spoon or rubber spatula until ingredients are incorporated.

DSC01062

4. Chill in refrigerator covered and serve.